How to reassemble your slush machine

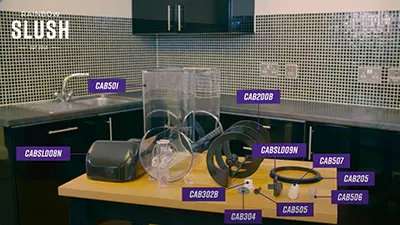
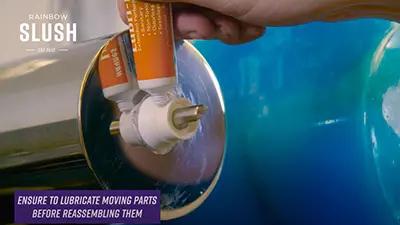
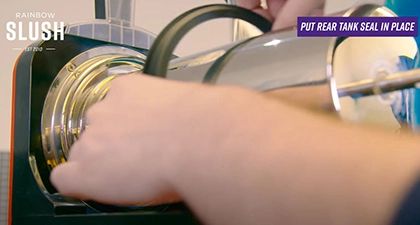
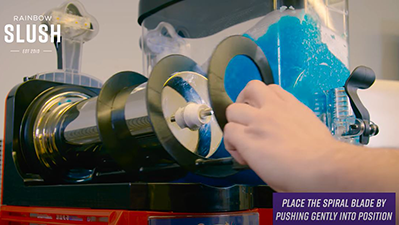
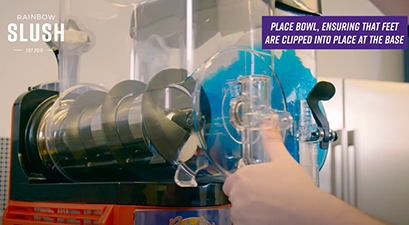
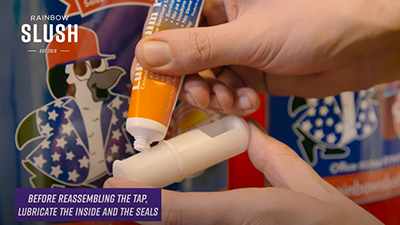
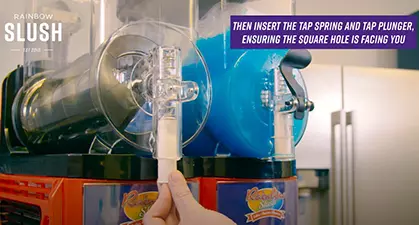
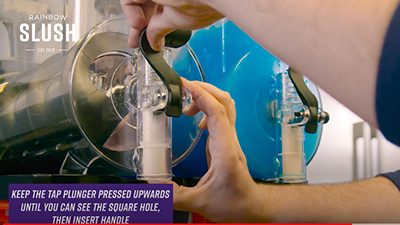
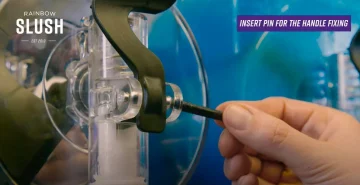
Slush machines are super simple to use and extremely low maintenance. However, if you have to take it apart for whatever reason, then you might require a little guidance to put it back together.

Don’t panic! We will show you how to reassemble a Rainbow Slush machine, it’s not rocket science.

Alternatively, simply follow these step-by-step instructions:

1. PARTS YOU SHOULD HAVE IN FRONT OF YOU

Parts of Rainbow Slush Machines

2. ENSURE YOU LUBRICATE MOVING PARTS BEFORE REASSEMBLING THEM

ENSURE YOU LUBRICATE MOVING PARTS

3. PUT THE REAR TANK SEAL IN PLACE

PUT PEAR TANK SEAL IN PLACE

4. REPLACE THE SPIRAL BLADE BY PUSHING GENTLY INTO POSITION

Place the spiral blade into position

5. REPLACE THE BOWL, ENSURING THAT ITS FEET ARE CLIPPED INTO PLACE AT THE BASE

Place bowl into place

6. BEFORE REASSEMBLING THE TAP, LUBRICATE THE INSIDE AND THE SEALS

LUBRICATE THE INSIDE

7. THEN INSERT THE TAP SPRING AND TAP PLUNGER, ENSURING THE SQUARE HOLE IS FACING YOU.

INSERT THE TAP SPRING

8. KEEP THE TAP PLUNGER PRESSED UPWARDS UNTIL YOU CAN SEE THE SQUARE HOLE

Keep the tap plunger pressed upwards

9. INSERT THE PIN FOR THE HANDLE FIXING

Insert Pin for the handle fixing

WARNING!

When inserting the main tap pin, care should be taken.

Please also note that these instructions are specifically for slush machines supplied by Rainbow Slush and steps may vary.

For further instructional videos about Rainbow Slush machines, visit our you tube channel.